10 Tips for Choosing Apparel Size Labels
Choosing the right Apparel Size Labels is not a minor packaging decision. It affects fit expectations, returns, customer trust, and the way a garment feels in a changing room. A small label may carry complex information: body measurements, regional sizing, fit categories, fiber content, care instructions, and brand-specific references. Yet many companies still treat sizing as a simple sequence of numbers or letters.
Kathleen Fasanella, a respected garment-industry patternmaker and author, has noted, “There is no such thing as standard sizing.” That observation remains practical today. A medium in one brand may feel tight across the shoulders, while another medium may hang loosely at the waist. Fabric stretch, garment construction, grading rules, and target customers all influence the result. Good labels should therefore be clear, readable, and connected to verified measurement data. They should also match the actual garment, not an idealized sample.
This guide presents 10 tips for choosing Apparel Size Labels with greater accuracy. It considers label placement, typography, measurement charts, international shoppers, durability, and production consistency. A label should survive repeated washing. It should remain legible inside a dark jacket or a soft knit top. Small details matter. Still, labels cannot fix poor pattern development or incomplete customer research. That limitation deserves attention. Even experienced teams can misjudge fit when they rely on outdated data or a single model. Testing labels with real wearers, reviewing return reasons, and revising size communication can produce better decisions. The process may not be perfect. It should remain honest, measurable, and open to improvement.
Understanding the Purpose and Role of Apparel Size Labels
A size label does more than display a letter or number. It helps shoppers connect a garment with their body measurements, expected fit, and wearing comfort. A clear label can reduce uncertainty in a fitting room or online order. It should be easy to read, securely attached, and resistant to repeated washing. Small details matter. Faded ink creates doubt.
In apparel development, size labels work best when they support a consistent measurement system. Designers and production teams should compare the label with actual garment dimensions, not rely on symbols alone. A medium shirt may have a 102-centimeter chest in one collection and 108 centimeters in another. That difference can change the customer’s experience. Measure the finished garment. Record tolerances. Check several production samples. Size labels should also separate body measurements from garment measurements when possible. This distinction explains why a loose jacket and a fitted top may share the same size. I have seen teams treat labels as a final packaging task, which is a mistake. They are part of product communication. Still, no label can describe every body shape perfectly. Fit preferences, fabric stretch, and pattern design remain important. A useful label informs without promising certainty. When reviewing labels, test them with real users, including people who shop across different size systems. Their questions often reveal unclear wording that internal teams overlook.
Identifying Key Measurements for Accurate Size Information
Accurate size labels begin with measurements shoppers can reproduce at home. Use a flexible tape, keep it level, and measure over light clothing. Record bust or chest, natural waist, full hip, shoulder width, sleeve length, and inseam. For fitted garments, add garment length and rise. Each point needs a clear location. “Waist” can mean the narrowest area or the waistband position. State which one you use.
Experienced fitting teams should measure a sample group, not one ideal body. Compare results across heights, proportions, and movement needs. I once treated hip width as the main fit signal. That choice failed for customers with fuller stomachs. A better chart includes ease, the space between the body and garment. Test sitting, reaching, and walking. Fit changes in motion. It matters.
Keep body measurements separate from finished garment measurements. Label the unit clearly, and avoid switching between inches and centimeters. Check the tape and record measurements twice. Small errors grow quickly across grading increments. Wash and wear tests can reveal shrinkage or seam distortion. Leave notes when data feels uncertain. Recheck it. Size labels should reflect measured evidence, although no chart fits every body perfectly.
Key Body Measurements for Accurate Apparel Size Labels
Reference body measurements in centimeters for adult apparel sizing. Compare bust, waist, and hip measurements before assigning a size label, and always verify the measurement standard used for your target market.
Accurate size information should identify the measurement points clearly and use consistent units. Customers should measure around the fullest part of the bust and hips, and around the natural waist.
Comparing Regional, Brand, and Garment Size Systems
Choosing Apparel Size Labels: Comparing Regional, Brand, and Garment Size Systems
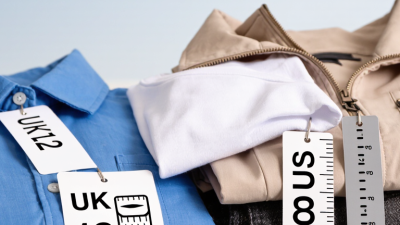
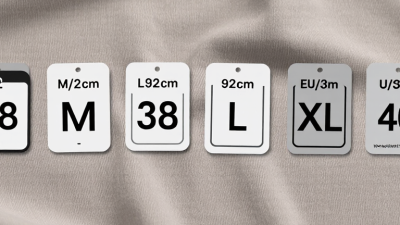
A size label is not a universal promise. Regional systems can differ sharply, even when the printed number looks familiar. A medium in one market may match a small or large elsewhere. Check the market before selecting a regional code. Then compare chest, waist, hip, and inseam measurements in centimeters or inches.
I have seen shoppers trust numbers too quickly. That assumption failed when a relaxed garment used a tighter regional chart. Brand sizing adds another layer because each company may define its own fit model. Review the actual size chart, not only the letter label. Look for notes such as slim, regular, oversized, or unisex. Measure a similar garment flat and compare it with the listed dimensions.
Garment sizing is usually the most dependable reference. It describes the finished item, including ease and construction allowances. A 100-centimeter chest may fit differently in woven fabric, stretch jersey, or lined outerwear. Fabric recovery matters. Wash testing also matters. Labels should remain readable after repeated care. Production teams should verify measurement tolerances before approval. I would also record the measuring method, since small process differences can create confusing results. No chart is perfect. Reflect on customer returns, adjust the chart, and keep regional conversions transparent.
Testing and Updating Labels Through Customer Feedback
10 Tips for Choosing Apparel Size Labels
Testing and Updating Labels Through Customer Feedback
A size label is a promise about fit, not merely a printed letter. Test it with real customers before approving production. Recruit different body shapes, heights, and age groups. Ask each participant to try the garment after washing it. Record tightness, sleeve length, waistband pressure, and movement comfort.
Use short questions after every fitting. “Too tight?” works better than a long survey. Add a QR code near the care label for purchase-time feedback. Track comments by garment style, fabric, and measured body dimensions. The National Retail Federation and Appriss Retail reported a 17.6% online return rate in 2023. Fit-related returns can quietly increase that cost. Return data should therefore sit beside survey responses, not replace them.
Compare customer comments with technical measurements. A medium may match a chart but still feel narrow across the shoulders. Review results after the first 30, 100, and 500 orders. Do not change labels from one angry message. Look for repeated patterns. The 2024 State of Fashion report from McKinsey and The Business of Fashion identifies personalization and customer data as growing priorities for apparel businesses. Still, data can mislead when feedback comes only from one region. Our first update may remain imperfect. Keep the old and proposed labels in a controlled test. Measure exchanges, returns, satisfaction scores, and support requests before wider release. Record why a decision changed. That record builds accountability.